Hi All, to the right is a new video (27th June 2023) where I ponder the
idea of how I would re-create a new Eggmotor; drawing on years of hindsight
and wisdom. I point out four main areas where I believe I would be able
to improve upon as long as there is a healthy financial budget to back me
up. I would greatly appreciate it if you guys could add your opinions and
thoughts in the comments section below the video of improvements I may have
missed or just some interesting chit-chat would be nice :)
Available from my publisher (and Amazon shortly) is this fantastic flight
log book.
Click the image for more info.
Although several years have passed since the retirement
of the Egg project, I still receive the occasional enquiry for advice on
active 'new-builds' around the globe. Many of the links on the original
site had expired and so I have endeavoured to provide up to date resources
for this revised web site.
Typical
Motor Specification
Engine: 196cc
4-stroke petrol.
Power: +12hp.
Thrust: >50kg
possible.
Engine Weight:
approx. 15kg.
Total Weight:
20kg - 30kg. (Dry)
Max. Pilot Weight:
100kg.
Propellor:
<130cm. (Re-drive)
Chassis: Typically
mild steel.
Endurance:
<4 hours. (Cruise)
Climb Rate:
<300fpm.
Engine
Stuff
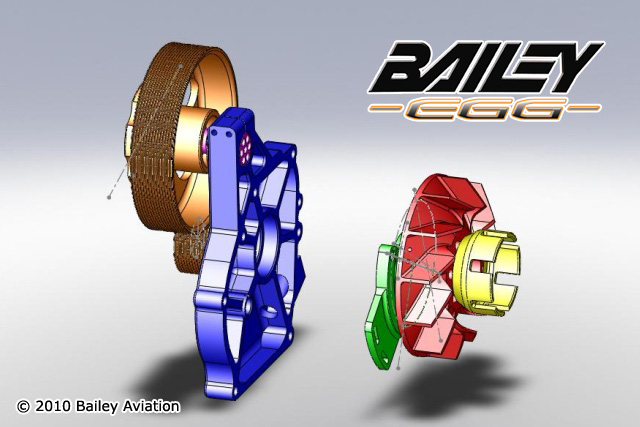
Developments by Bailey Aviation back in 2010 meant that
even more thrust was available from the plucky little four stroke. Bespoke
reduction drives, engine mount kits, carburettor and exhaust systems took
the Eggmotor into the next phase of viable paramotor design and performance.
The principal aim that underlined the Eggmotor development
was the need for a simple, reliable and above all, affordable paramotor.
Taking a humble 6.5hp industrial engine and transforming
it into a 12hp paramotor power unit capable of up to 50kg thrust (reduction-drive
variant). <40kg thrust in direct-drive guise.
Direct
or Reduction Drive?
Harness
Please Note:
I will not accept responsibility for the quality of your own creation, nor
for it’s use. You, as the builder/pilot are solely responsible for your
own actions regarding the construction and use of any machine built and/or
flown with the aid of information gathered from this web site.
Some kits and parts are still available from Bailey Aviation.
Click here to visit: Bailey
Aviation
D-drive Positives:
Smaller frame
Lighter weight
Simple design
Easier construction
The engine you need in order to follow the technical information
on this web site is a Honda GX200 6.5hp or a cheaper Far Eastern clone version
with a 3/4 inch diameter parallel Q-shaft output shaft.
Ebay is a good source for new Honda or clone GX200 engines.
Expect to pay in the region £90 - £120 for a clone engine and
much more for a genuine Honda. You'll need a minimum of 13hp worth of modifications
if going for the direct drive version or as little as 12hp if you decide on
the reduction drive option i.e. Bailey Egg conversion.
Re-drive Positives:
More thrust
Greater efficiency
Flight duration
Quieter flight
Our early development was based on the direct drive principle.
Initial experimentation and test flights were conducted with a 34" propeller
and then a larger 36" propeller. Now with the aid of a Bailey Egg reduction
kit, our latest prototype (see video below) now provides roughly 20% more
thrust compared to the old direct drive machine. The Bailey Egg reduction
kit has a ratio of 2.65:1 and is ideal for turning a 130cm diameter propeller
to achieve around 50kg(110lb) thrust with a mere 12-13hp at 6500rpm.
More
Throttle
A big thank you to originally
Intrascape and now Atspace for the
free web hosting service.
Please check out
my book promo >>>
GX200 Strip Down Video
You will need to improve the engine with various parts including
stronger valve springs (if going over 5000rpm/reduction drive option), higher
lift camshaft, milled higher compression cylinder head, free-flow air filter,
exhaust and also a billet alloy flywheel (weight saving/less cooling drag)
and billet alloy con-rod (high rpm reliability). Parts are available at:
To finish the engine off you'll also need a hub (direct
drive version only) to couple the propeller to the engine. Zero
Error have them available.
The ideal propeller for the direct drive
option is the Xoar
PJD-P 34" x 10" (Pusher version). You'll need
to specify when ordering the propeller for M6
x 6 x 42.85mm diameter bolt dimensions. If you wish to persue reduction
drive propeller options then please contact Bailey
Aviation or D&T
Propellers. (You'll need to specify to D&T that you require the 'Honda
Eggmotor 2:65' propeller which you'll find if you scroll down on the list
from the page link I have added).
Engine
& Parts Sources
A high hang point harness gives you the simplest set up
to fabricate and use. An APCO harness is the type that we used and we found
it more than adequate.
N.B. While hang-testing the
prototype I could feel the engine pulling down more on my right side due
to the engine weight being offset. To compensate for this, the harness eye-bolt
on the cylinder side is closer to the edge of the frame by about 1 inch
(25mm) compared to the other side.
Those of you heading for reduction drive will need to look into your options
available to you regarding a suitable frame/cage.
Chassis
(Direct Drive Only)
Here is a pdf file for the early basic frame and cage design
for the 34" propeller sized Eggmotor.
Click
image to download.
Throttle
The hand-held throttle unit will allow you to alter the
power/rpm during you flight. This in turn will control your pitch, so with
no power applied you will slowly descend at the wing’s glide ratio.
At full power you will climb and at somewhere in the middle you can maintain
level flight. The addition of a kill switch allows you to stop the engine
within a couple of seconds.
It should be fairly easy to fabricate with a bicycle brake
lever, brake cable, push-to-make button and some wiring.
An easy method to connect at the engine end is to modify
the standard throttle lever and utilize it as a bracket for the cable end.
Strip the throttle lever assembly down and cut the lever along the line as
shown in the first picture. Then mount it onto the fuel tank bracket as shown
on the second picture using a spare screw/bolt. You will need a cable adjuster
to thread through the other hole in your make-shift bracket in order to fit
the cable through. You maybe required to open up the hole a little bit in
order to fit the adjuster. I've used a cheap brass one and fitted a locking
nut to the other side. It is just a matter of fixing the inner cable to the
'J' shaped governor arm as close to the end (near throttle rod/spring) as
possible. If you fix it too close to the governor arm pivot point then the
throttle will be difficult to actuate due to lack of leverage. I used a small
nut/bolt set up threaded through one of the many holes in the governor arm
and basically 'pinched' the inner cable in place.
Close
up of cable attachment
Throttle
Extra
The last item in this section is hooking up the kill switch
circuit, this is quite a simple operation. Just attach one wire to ideally
the engine or the chassis (ensuring a good earth). Then fit the other wire
from the kill switch to the spare connector where the low-oil sensor wire
was fitted (see picture). You might want to fit a bullet/bulb type connector
to the end of the wire to ensure a snug fitting connection or you could snip
the low-oil sensor connector off and either solder or 'choccy-block' them
together.
Egg
Men
Rob Shaw - Chief Developer
Greater detail into my passion behind the project along
with interesting anedotes can be found in my book 'The Chronicles Of Egg'.
Also, my new book 'Do-It-Yourself Flying Machine' will give you an almost
indepth fabrication guide to building your own Eggmotor. Both are available
to purchase from my publisher (Lulu.com) as well as from Amazon. Ebook versions
are also available to, please see the links at the top of the page.
One
More Thing...
Sam and I would like to take this opportunity to thank
all those who have helped, advised and generally been supportive of our endeavours
since the start of the Egg project back in 2007.
Thank
You.
Please Note:
I will not accept responsibility for the quality of your own creation, nor
for it’s use. You, as the builder/pilot are solely responsible for your
own actions regarding the construction and use of any machine built and/or
flown with the aid of information gathered from this web site or my publications.
This website was created and
updated by the Team Eggmotor Chief Developer, Robert Shaw.


